


Dental crowns are a reliable way to restore damaged, weakened, or severely decayed teeth. They act like protective caps that cover the entire visible portion of a tooth, improving both strength and appearance. But before a crown can be placed, your dentist must carefully prepare the tooth to ensure a proper fit and long-lasting result.
Step 1: Examination and Planning
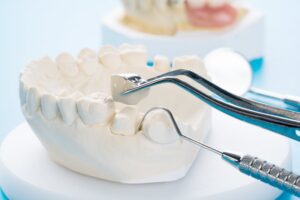
The process begins with a thorough evaluation of your tooth. Your dentist will examine the area, often using X-rays, to assess the extent of damage and check the health of the surrounding bone and roots.
If there’s significant decay or infection, treatment may be needed first. For example, a tooth with deep decay might require a root canal to address issues like pulpitis before moving forward with a crown.
Step 2: Numbing the Area
Before any preparation begins, your dentist will numb the tooth and surrounding tissues with a local anesthetic. This ensures that you remain comfortable throughout the procedure.
Most patients feel little to no discomfort during this step, and the numbing effect typically lasts for a few hours afterward.
Step 3: Reshaping the Tooth
Next, your dentist will reshape the tooth by removing a small amount of enamel from all sides. This creates space for the crown so that it fits naturally alongside your other teeth.
The amount of tooth structure removed depends on the type of crown being used. For example, porcelain crowns may require slightly more reduction than metal ones to achieve the right thickness and appearance.
If a large portion of the tooth is missing due to decay or damage, your dentist may build it up with a filling material before shaping it.
Step 4: Taking Impressions
Once the tooth is properly shaped, your dentist will take an impression or digital scan of the area. This model is used to create a custom crown that matches the size, shape, and color of your natural teeth.
These impressions are sent to a dental lab, where your permanent crown is fabricated.
Step 5: Placing a Temporary Crown
While your permanent crown is being made, your dentist will place a temporary crown to protect the prepared tooth. This temporary restoration allows you to eat and speak normally while waiting for your final crown.
You’ll be given instructions on how to care for it, such as avoiding sticky or hard foods.
Step 6: Final Placement
At your next visit, the temporary crown is removed and replaced with your custom-made permanent crown. Your dentist will check the fit, bite, and appearance before securely bonding it in place.
Preparing a tooth for a crown is a precise and carefully planned process. Each step from evaluation to final placement is designed to ensure durability, comfort, and a natural look. If your dentist recommends a crown, understanding the process can help you feel more confident and prepared for your treatment.
About the Author
Dr. Megan McInnis earned her Doctor of Dental Surgery degree from the Texas A&M Health Science Center Baylor College of Dentistry in Dallas. These days, she stays current in her field and on top of the latest developments through memberships in the American Dental Association and the Oregon Dental Association. If you’d like to repair your damaged tooth with a dental crown, just book an appointment with us at RiverPlace Dental through our website or by calling our Portland office at (503) 761-1414.